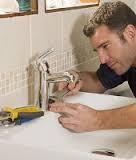
Have you stopped to think about the amount of money we’ve wasted over the years for not knowing 4 or 5 basic DIY issues? Many times we make the mistake of considering that to paint a wall or repair a blind, to give two examples, it is necessary to be a real handyman. Nothing could be further from the truth.
We have set out to demystify the world of DIY so that we can maintain control over our homes and save a significant amount of money by dealing with such basic issues as these ourselves.
Today we’re talking about 3 plumbing tricks that we can do completely on our own and that will get us out of more than one predicament. We’ll learn how to change a faucet, unblock the sink or clean a siphon. Don’t miss it!
Replacing the sink faucet in just 6 steps
First of all, we will select a faucet according to the decoration of the rest of the bathroom: modern, classic, metallic, matt. There are a lot of options, and we think it’s a great opportunity to add a touch of design in a simple and economical way.
1. Forecasting and setting up the work area – that sounds very bombastic, but it’s as simple as putting a bucket or other container under the sink to keep water from falling to the ground.
2. Next, we will cut off the water by turning the stopcocks that come out of the hoses that go to the faucet.
3. Afterwards, you can open the tap to empty it completely and unscrew the hoses.
4. We’ll also unscrew the faucet from underneath.
5. When it is time to place the faucet, we will first pass the hoses carefully one at a time and connect them to the faucet.
6. All that remains is to screw in the new tap, open the square wrenches, and check that everything is working correctly and that the installation does not lose water.
Tips to keep in mind:
Normally the hot water corresponds to the left hose and the cold water hose to the right hose.
We can take advantage of the change of tap to install an aerator that allows us to reduce water consumption by up to 50%.
How to unblock the sink
First of all, we’ll turn the tap on in the hot water position, just for a few moments, just long enough for there to be a water base before we start our first bet. Then we will spread a small layer of Vaseline on the bottom of a plunger and pump it with firm, dry movements.
If despite the effort, the jam persists, and the cause of the jam is not found at great depths, we will try with a wire or screwdriver, there are even specific unblockers for hair. We will place any of them in the drain, making a little bit of lever and exercising movements that get the dirt off the walls of the pipe. The latter is also a good preventive system and should be done on a regular basis to avoid further problems in the future.
Finally, and before we give up, we will turn to the very useful and popular chemical plungers. You will find many options: from weekly treatments to avoid odors and residues, to the most powerful products on the market made from a mixture of sodium hypochlorite and potassium hydroxide. There won’t be any traffic jams that can resist us!
Cleaning the sink siphon
The best way to avoid any kind of clogging is to clean the sink siphon from time to time.
1. Before we get down to business, we’ll put a bucket in the work area, that is, under the sink siphon, in order to keep staining to a minimum.
2. Remove the elbow plug, if our siphon has one, and loosen the drain plugs.
3. Clean all parts with plenty of soap and water and dry them.
4. We promised you simple projects and here you have them, right? Believe it or not, our siphon is ready, we just have to reassemble it following step 2 in reverse.
This Blog was posted by Chambliss Plumbing in San Antonio, Texas